Setting Availability
In order for students to make appointments with you, the first thing you need to do is set up availability in Bulldog Navigate. Your availability will be based on locations and services already created in Bulldog Navigate.
- Step 1
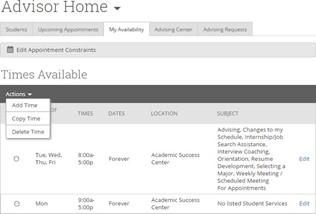
Step 1: From your home screen, click the tab for My Availability, and click the Add Time button in the Actions Menu
Back to Top - Step 2
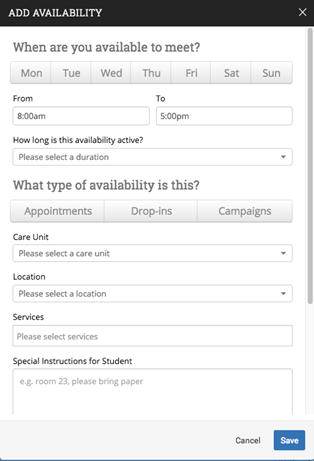
Step 2: Select the days and times when you are available to meet with students. If you are available different times on different days, set up other availability profiles after this is saved.
Back to Top - Step 3
Step 3: Set your times broadly – as early and late as you will ever have appointments – and then you will manage your specific availability through your Outlook calendar.
Back to Top - Step 4
Step 4: You can set your availability for this semester, for a range of dates, or forever. When you need to make a change, you can always just come back to edit this profile. Students will only be able to see appointment times for the next 14 days.
Back to Top - Step 5
Step 5: Select whether you will meet with students via appointments or drop-ins, or you can select both. The campaign option is normally reserved specifically as dedicated time for targeted students to make appointments with you.
Back to Top - Step 6
Step 6: Choose Advising as the Care Unit.
Back to Top - Step 7
Step 7: Choose the location where you will be available
Back to Top - Step 8
Step 8: Select which services you can provide to students during this availability. Make sure to select ALL of the specific services for your location marked with asterisks – if you miss one, then you will not show as available for that service. You do not need to choose the advisor-facing services (without an asterisk) because students will not choose those when making an appointment.
Leaving this services field empty means you will appear to be available for every advising service on campus. Don’t leave blank!
Back to Top - Step 9
Step 9: List any Special Instructions that you want students to see for the appointment, such as location hints.
Back to Top - Step 10
Step 10: Finally, you can indicate whether you will allow more than one student at a particular appointment time.
Click Save. Repeat for any other availability profiles you’d like.
Back to Top